A well tuned antenna system works like a dummy load, i.e. the SWR is 1.2:1 or below but the hunting range is low. What's wrong? Insufficient radiation? How to know that? Yes, this is what the article about. You can measure the effective radiation using a field strength meter (FSM). A commercial FSM can measure the loss or gain of radiation, testing polarisation, plot the radiation pattern for the various antennas for comparison. The cost for a commercial FSM can vary from Rs 1500/- to Rs 5000. But this design one can assemble for a few hundred.
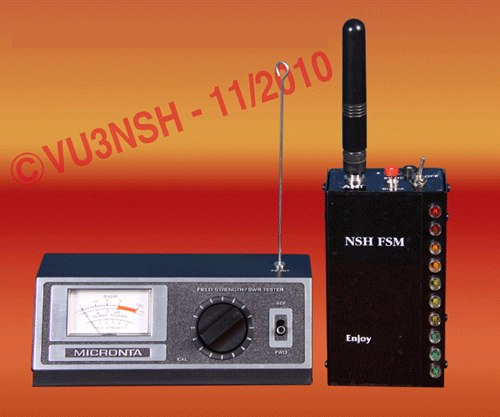
The Standard Analog Meters or LCD - DVM based FSM are some what “DEAF” and the meter level movement can’t be read from a distance of around 5 ft and above. To avoid this problem, this FSM is having a 10 level multi coloured 3mm LEDs for level reading; this will give a fair reading up to 20 ft + distance even at night.
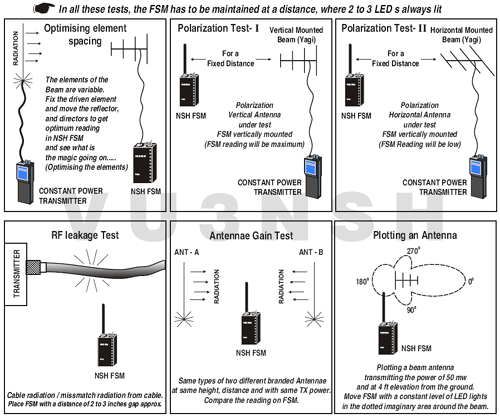
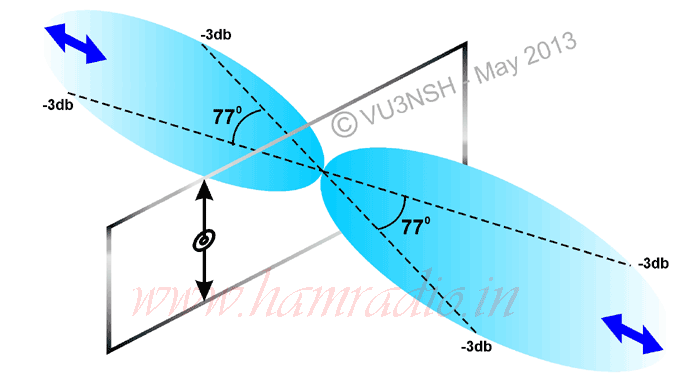
The FSM will give RF radiation reading; picked through the air, that shows an antenna’s gain of radiation. Due to this REAL READING, one can compare different types of antennas gain, angle of radiation, polarization etc. The FSM sniffs out bad coax, connectors or improperly grounded transmitter. It is a good instrument to plot radiation patterns of yagis / verticals. It is an educational tool for studies. SWR meter cannot do or detect some measurements about RF. But this FSM will do!.
When Working with different types of input RF signal levels, the sensitivity of the NSH FSM can be controlled by changing different types of sensing antennas. Remember that, VSWR meter only shows that the antenna is fully loading and shows a low reflected power or very low SWR, but it does not mean that the antenna is efficiently radiating the TX power into AIR - The only tool that shows the exact on-air radiation levels is FSM.
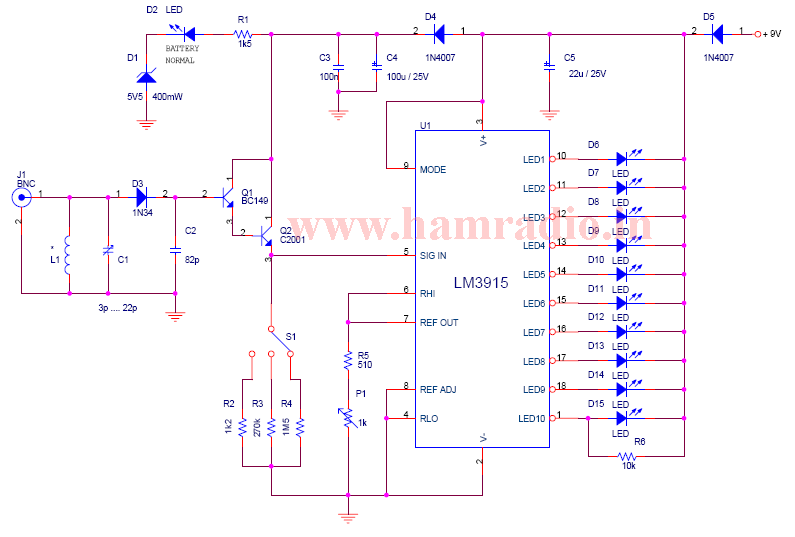
This FSM is designed to work on 2 meter (144 - 146 MHz) . A tuned L-C circuit at input is used to make the FSM selective for the desired band. The heart of this circuit is LM3915 dot/bar display driver from National Semiconductors, providing a logarithmic 3dB/step analog display. Disconnecting 1C1 pin 9 from +ve supply, changes the display from a bar graph to a moving dot display, hence reducing the total power consumption. In bar graph mode, up to 100mA may be drawn from the battery when all LEDs are on. The FSM can be powered by a 9V(6F22) battery.
The inductor L1 consists of 2.5 turns of 22 SWG enamelled copper wire, and the internal diameter is 7mm and air core. The two transistors forms a high gain amplifiers and the output voltage is depends on the resistor selected (L, M, H) by the sensitivity selector S1.
The circuit should be installed in a metal box. Three LEDs of green, three LEDs of yellow, three LEDs of orange and finally two LEDs of red are arranged in increasing order for the field strength levels. The highest level of LED is wired to pin 10 and lowest level LED is wired to pin 1 of IC1.
For tuning this FSM, connect the rubber flux antenna to the input of the FSM, and kept vertical. Select 145 MHz in the hand held, select 500 mW and, set up and try FSM at reasonable distance. Key the transceiver and read the segment. If it is full increase the distance between, till one or two LED to glow. Then trim C1 for getting more LED to lit. LED brightness can be adjusted by P1 if necessary.
1 inch whip, 6 inch whip, 19.25 inches (quarter lambda) or diamond RH3, RH10 can be used as input sensing antennas for this FSM.
